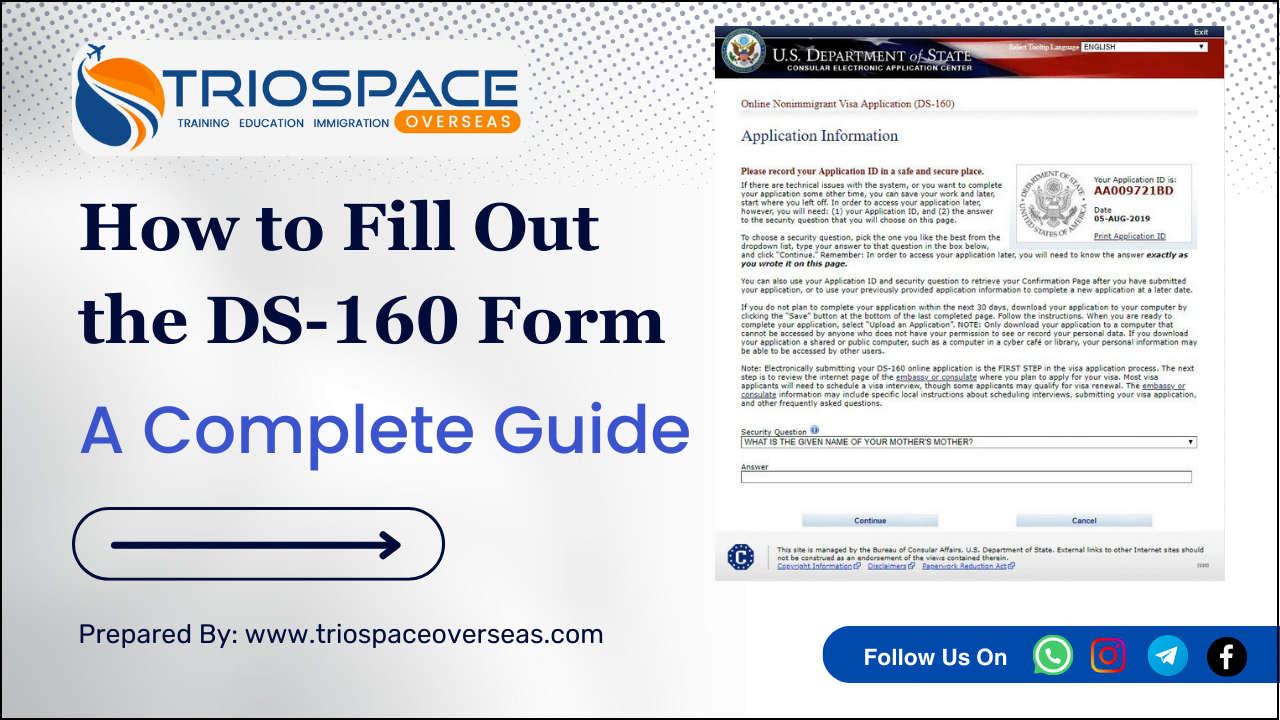
How to fill out the DS-160 Form. A Complete Guide
A Brief Overview of What the DS-160 Form Is
The DS-160, also known as the Online Non-immigrant Visa Application, is an essential form for individuals seeking a temporary visa to the United States. This comprehensive form collects the applicant’s personal, travel, and background information, serving as a crucial component in the visa application process. Whether you are applying for a tourist visa, business visa, student visa, or any other type of nonimmigrant visa, completing the DS-160 form is a mandatory step.
Importance of Correctly Filling Out the DS-160 for U.S. Visa Applications
Accurately completing the DS-160 form is vital for several reasons. First and foremost, the information provided on this form is used by consular officers to determine your eligibility for a U.S. visa. Any inaccuracies or inconsistencies can lead to delays, additional scrutiny, or even denial of your visa application. Additionally, the DS-160 form is linked to your visa interview; thus, ensuring that all information is truthful and precise can significantly improve your chances of a successful application. Given the complexity and importance of this form, a thorough and accurate completion is essential for a smooth visa application process.
Purpose of the Guide
This guide aims to provide a comprehensive, step-by-step walkthrough of the DS-160 form to help applicants navigate the process with confidence and ease. By breaking down each section of the form and offering detailed instructions, tips, and best practices, this guide seeks to eliminate confusion and reduce the likelihood of errors. Whether you are filling out the DS-160 form for the first time or need a refresher, this guide will equip you with the knowledge and tools to complete your application accurately and efficiently. We aim to make the visa application process as straightforward and stress-free as possible, helping you move one step closer to your journey to the United States.
Pre-Filling Requirements
Before you begin filling out the DS-160 form, it’s essential to gather all necessary documents and information to ensure a smooth and accurate application process. Below is a list of the key items you’ll need:
Documents and Information Needed Before Starting
Passport
Your passport is the most critical document required for the DS-160 form. Ensure that it is valid for at least six months beyond your intended stay in the United States. You will need to enter your passport number, issuance date, and expiration date accurately.
Travel Itinerary
If you have already made travel arrangements, have your itinerary handy. This includes flight details, dates of travel, and accommodation information. Even if your plans are not finalized, providing tentative details can be helpful.
Dates of Your Last Five Visits to the United States (If Applicable)
If you have previously traveled to the United States, you will need to provide the dates of your last five visits. This includes the month, day, and year of each trip. Keep your old passports or travel records nearby to reference these dates accurately.
Résumé/CV
You may be required to provide detailed information about your educational and professional background. Having a current résumé or CV can help ensure that you have all relevant information, such as employment history, job titles, and educational qualifications, at your fingertips.
Details of Your Travel Companions
If you are traveling with family members, friends, or colleagues, you will need to provide their names and relationships to you. Make sure you have their full legal names as they appear on their passports.
Information About Your U.S. Point of Contact
You will need to provide the name, address, and contact details of a person in the United States who can verify your travel plans or assist with your visit. This could be a relative, friend, or business associate. If you do not have a specific contact, you may use the details of your hotel or travel organization.
Information About Your Relatives in the U.S. (If Any)
If you have immediate family members, such as parents, siblings, or children, who are living in the United States, you will need to provide their names, their relationship to you, and their legal status in the U.S. (citizen, permanent resident, etc.).
Tips for Gathering and Organizing This Information
1. Create a Checklist: Make a checklist of all the documents and information you need. This helps ensure that you don’t overlook any critical details.
2. Use Digital Copies: Scan and save digital copies of important documents like your passport, itinerary, and résumé. This makes it easier to reference them while filling out the form.
3. Organize by Category: Group your documents and information into categories (e.g., travel, personal, employment) to make it easier to locate them when needed.
4. Double-check information: Verify all details for accuracy. Incorrect information can lead to delays or complications in your visa application.
5. Keep It Accessible: Store all gathered documents and information in a folder or binder that you can easily access when needed.
By preparing these documents and information ahead of time, you’ll be able to complete the DS-160 form more efficiently and with greater accuracy, setting a solid foundation for a successful visa application process.
Accessing the DS-160 Form
Filling out the DS-160 form is a crucial step in the U.S. visa application process. Here’s a step-by-step guide on how to access and start your DS-160 form online:
Step-by-Step Instructions to Access the DS-160 Form Online
Creating an Account on the Consular Electronic Application Center (CEAC) Website
1. Visit the CEAC Website: Open your web browser and go to the Consular Electronic Application Center (CEAC) website at ceac.state.gov.
2. Locate the DS-160 Form: On the CEAC homepage, you will find various options. Click on the “DS-160, Online Nonimmigrant Visa Application” link.
3. Choose Your Location: Select the location where you will be applying for the visa from the dropdown menu. This is typically the U.S. Embassy or Consulate where you will attend your visa interview.
4. Create an Account (If Required): While the DS-160 form itself does not require creating an account, it’s beneficial to have an account for other visa-related processes. If prompted, follow the instructions to create an account using your email address and a secure password.
Selecting the Appropriate Visa Category
1. Start a New Application: Click on the “Start an Application” button to begin filling out the DS-160 form.
2. Security Question: You will be asked to choose and answer a security question. This will
help you retrieve your application if you need to return to it later.
3. Application ID: You will be assigned a unique Application ID. Write this down and keep it safe, as you will need it to access your application later.
Starting a New Application
1. Personal Information: Begin by entering your personal information, including your full name, date of birth, nationality, and other biographical details. Ensure all information matches your passport exactly.
2. Travel Information: Provide details about your travel plans, including the purpose of your trip, intended dates of travel, and places you plan to visit. If your plans are not finalized, provide estimated dates.
3. Passport Information: Enter your passport details, such as the passport number, country of issuance, and expiration date.
4. Contact Information: Fill in your contact details, including your home address, phone number, and email address.
5. Family Information: Provide information about your family, including names and details of your parents, spouse, and children, if applicable.
6. Work/Education/Training Information: Enter details about your employment history, educational background, and any training you have undergone. Include current and previous jobs, schools attended, and degrees obtained.
7. Security and Background Information: Answer a series of security-related questions regarding your background. These questions cover topics such as criminal history, visa violations, and other pertinent issues. Answer honestly and accurately.
8. Upload Photo: You will be asked to upload a recent photograph that meets the U.S. visa photo requirements. Follow the guidelines provided to ensure your photo is accepted.
9. Review Your Application: Carefully review all the information you have entered. Ensure that all details are accurate and complete. Mistakes or omissions can lead to delays or denial of your visa application.
10. Submit the Application: Once you have reviewed your application and confirmed that all information is correct, submit the DS-160 form. You will receive a confirmation page with a barcode. Print this confirmation page, as you will need to bring it to your visa interview.
By following these steps, you can successfully access and start your DS-160 form online. Taking the time to fill out the form accurately and thoroughly will help ensure a smoother visa application process.
Detailed Guide to Filling Out Each Section of the DS-160 Form
Filling out the DS-160 form accurately is crucial for your U.S. visa application. Below is a detailed guide for each section of the form, including instructions and common mistakes to avoid.
Personal Information
Instructions for Entering Personal Details:
– Full Name: Enter your full legal name as it appears on your passport.
– Other Names Used: Include any other names you have used, such as maiden names or aliases.
– Gender, Marital Status, and Date of Birth: Fill in these details accurately.
– Place of Birth: Provide the city, state/province, and country where you were born.
– Nationality: Enter your current nationality and any other nationalities you hold or have held.
Common Mistakes to Avoid:
– Typos: Double-check the spelling of all names and places.
– Incorrect Dates: Ensure your date of birth matches your passport.
– Missing Other Names: Include all previous names to avoid discrepancies.
Travel Information
How to Correctly Input Travel Dates and the Purpose of the Trip:
– Primary Purpose of Trip: Select the main reason for your visit from the provided options.
– Intended Date of Arrival and Length of Stay: Provide your expected arrival date and the duration of your stay.
Providing Accurate Travel Companions’ Details:
– Travel Companions: List the full names and relationships of any individuals traveling with you.
Common Mistakes to Avoid:
– Estimated Dates: If your dates are not fixed, provide the best estimates.
– Incomplete Companion Info: Include all travel companions, even if they are not applying for a visa with you.
Passport Information
Ensuring Passport Details Are Entered Correctly:
– Passport Number: Enter your passport number exactly as it appears.
– Country of Issuance and Expiration Date: Provide the issuing country and ensure the expiration date is correct.
What to Do If You Have Multiple Passports:
– Primary Passport: Enter details of the passport you will use for travel to the U.S.
– Additional Passports: You may be asked about other passports during the interview, so be prepared with those details.
Common Mistakes to Avoid:
– Incorrect Passport Numbers: Double-check for accuracy.
– Expired Passports: Ensure your passport is valid for at least six months beyond your intended stay.
Contact Information
Providing Your Contact Details Accurately:
– Home Address: Enter your full residential address, including street, city, state/province, and postal code.
– Phone Number and Email: Provide current and active contact details.
Address Format and Common Errors:
– Complete Addresses: Ensure no parts of your address are missing.
– Consistent Format: Follow the address format used in your country.
Common Mistakes to Avoid:
– Outdated Information: Use current contact information.
– Partial Addresses: Do not leave out any part of your address.
Family Information
How to Fill in Family Information Correctly:
– Parents’ Names: Enter the full names of your parents, even if deceased.
– Spouse and Children: Provide details about your spouse and children, including names and dates of birth.
Special Notes for Relatives in the U.S.:
– Relatives in the U.S.: Provide information about immediate family members living in the U.S., including their status (citizen, permanent resident, etc.).
Common Mistakes to Avoid:
– Incomplete Family Details: Ensure all required family information is provided.
– Incorrect Relationship Information: Double-check relationships and names.
Work/Education/Training Information
Detailed Instructions for Providing Work and Education History:
– Current Employer: Enter details about your current job, including employer name, address, job title, and start date.
– Previous Employment: Provide information about past jobs, including positions and dates.
– Educational Background: List all post-secondary education, including institutions attended and degrees earned.
What to Include and What to Leave Out:
– Include All significant employment and educational experiences.
– Leave Out: Irrelevant or minor jobs and educational courses.
Common Mistakes to Avoid:
– Inconsistent Dates: Ensure dates do not overlap incorrectly.
– Missing Information: Include all required employment and education details.
Security and Background Information
Understanding the Security Questions:
– Series of Yes/No Questions: Answer truthfully about your criminal history, visa violations, and other security-related topics.
Importance of Honesty and Accuracy:
– Be Honest: Answer all questions truthfully. Misrepresentation can lead to visa denial and future travel bans.
– Provide Explanations: If you answer “Yes” to any question, provide the necessary details and explanations.
Common Mistakes to Avoid:
– Omissions: Do not omit any relevant information.
– Misleading Answers: Ensure answers are accurate and complete.
Reviewing and Submitting the DS-160 Form
Importance of Reviewing Your Entries:
– Double-check all Information: Ensure that all sections of the form are filled out correctly and completely.
How to Review and Make Corrections If Needed:
– Review Page: Use the review page to go over all your entries.
– Make Corrections: If you find any errors, use the “Edit” option to correct them before submission.
Submitting the Form and Saving the Confirmation Page:
– Submit the Application: Once reviewed, submit the DS-160 form.
– Print the Confirmation Page: Save and print the confirmation page with the barcode. You will need this page for your visa interview.
By following this detailed guide, you can ensure that each section of your DS-160 form is filled out accurately, reducing the risk of errors and enhancing the likelihood of a successful visa application process.
Reviewing and Submitting the DS-160 Form
Completing the DS-160 form accurately is crucial for your U.S. visa application. Before submitting, it’s essential to review all your entries carefully. This section outlines the importance of reviewing your entries, how to make corrections, and the final steps for submission.
Importance of Reviewing Your Entries
Reviewing your DS-160 form entries is vital for several reasons:
1. Accuracy: Ensuring all information is correct and matches your supporting documents (e.g., passport, travel itinerary) helps avoid delays or denials.
2. Consistency: Consistent information across your application and supporting documents strengthens your application and reduces the risk of discrepancies during the visa interview.
3. Completeness: Missing information can lead to an incomplete application, which might be rejected or require additional documentation.
How to Review and Make Corrections If Needed
1. Initial Review: After filling out the form, click on the “Review” button at the end of the DS-160 application. This will display a summary of all the information you have entered.
2. Check for Errors: Carefully go through each section. Look for typos, incorrect dates, and any inconsistencies with your passport and other documents.
3. Edit Information: If you find any mistakes, click on the “Edit” button for the relevant section. This will take you back to the section where you can make the necessary corrections.
4. Save Changes: After making corrections, save each section to ensure your changes are updated in the application.
5. Final Review: Once all corrections are made, conduct a final review. Double-check the entire form to ensure every detail is accurate and complete.
Submitting the Form and Saving the Confirmation Page
1. Submit the Application: Once you are confident that all information is accurate and complete, click the “Submit” button at the end of the review process.
2. Generate Confirmation Page: After submission, the system will generate a confirmation page with a barcode. This page is critical for your visa application process.
3. Save the Confirmation Page:
– Print a Hard Copy: Print a copy of the confirmation page. You will need to bring this to your visa interview.
– Save a Digital Copy: Save a PDF copy of the confirmation page on your computer or cloud storage. This ensures you have a backup in case the printed copy is lost or damaged.
4. Note the Application ID: Make a note of your DS-160 application ID. This ID can be used to retrieve your application if needed and is required for scheduling your visa interview.
By thoroughly reviewing and correctly submitting your DS-160 form, you ensure that your application process proceeds smoothly and efficiently. A well-prepared DS-160 form sets a strong foundation for a successful U.S. visa application.
Next Steps After Submission
Once you have submitted your DS-160 form and saved the confirmation page, there are several important steps you need to follow to complete your visa application process. These steps include scheduling a visa interview, paying the visa application fee, and preparing the necessary documents to bring to your interview.
Scheduling a Visa Interview
1. Locate the U.S. Embassy or Consulate: Identify the U.S. Embassy or Consulate where you will apply for your visa. You can find a list of embassies and consulates on the U.S. Department of State’s website.
2. Create a Profile: Visit the official U.S. Visa Information and Appointment Services website for your country and create a profile. This website allows you to schedule your visa interview and provides information specific to your location.
3. Login and Schedule: Log in to your profile and follow the instructions to schedule your visa appointment. You will need the DS-160 confirmation number to book your appointment.
4. Select a Date and Time: Choose an available date and time for your interview. Remember that wait times can vary, so it’s advisable to schedule as early as possible.
5. Confirm Appointment: Once you have selected your appointment, confirm and print the appointment confirmation letter. This letter will include details of your interview appointment.
Paying the Visa Application Fee
1. Determine the Fee: The visa application fee varies depending on the type of visa you are applying for. Check the fee amount on the U.S. Embassy or Consulate website for your location.
2. Payment Methods: The U.S. Visa Information and Appointment Services website will provide information on accepted payment methods. Common options include:
– Online Payment: Pay using a credit or debit card.
– Bank Payment: Pay in person at a designated bank.
– Mobile Payment: Some locations may offer mobile payment options.
3. Pay the Fee: Follow the instructions to pay the visa application fee. Ensure you keep the payment receipt, as you will need it for your visa interview.
4. Update Your Profile: After paying the fee, update your profile on the U.S. Visa Information and Appointment Services website with your payment receipt number.
Documents to Bring to the Visa Interview
1. Appointment Confirmation Page: Bring the appointment confirmation page you received when you scheduled your interview.
2. DS-160 Confirmation Page: This includes the barcode that was generated when you submitted your DS-160 form.
3. Passport: Your passport must be valid for at least six months beyond your intended stay in the U.S. Bring all current and previous passports, if applicable.
4. Visa Application Fee Receipt: Proof of payment for the visa application fee.
5. Photo: A recent passport-sized photo that meets U.S. visa requirements. While you upload a photo with your DS-160, it’s good to have a physical copy.
6. Supporting Documents: Depending on your visa type, bring supporting documents such as:
– Travel Itinerary: Proof of your travel plans, including flight and hotel bookings.
– Financial Documents: Bank statements, pay stubs, or other evidence of financial support.
– Employment or Education Verification: Letters from your employer or educational institution.
– Invitation Letter: If applicable, a letter from your U.S. contact or host.
7. Additional Documentation: Any other documents required by the specific U.S. Embassy or Consulate. Check their website for a detailed list of required documents.
By following these steps and ensuring you have all the necessary documents, you will be well-prepared for your visa interview. Proper preparation helps to streamline the process and increases the likelihood of a successful visa application.
Tips and Best Practices
Navigating the DS-160 form and visa application process can be challenging. Here are some tips and best practices to help you avoid common pitfalls, ensure a smooth application process, and handle technical issues effectively.
Common Pitfalls and How to Avoid Them
1. Inaccurate Information: Ensure all information matches your official documents (e.g., passport, birth certificate).
2. Incomplete Form: Leaving sections incomplete can lead to delays or rejection.
3. Misleading Answers: Providing false or misleading information can result in denial and potential bans.
4. Ignoring Instructions: Skipping or misreading instructions can lead to errors.
5. Procrastination: Waiting until the last minute can cause unnecessary stress and mistakes.
Tips for a Smooth Application Process
1. Prepare Documents in Advance: Gather all necessary documents before starting the application.
2. Use a Reliable Computer and Internet Connection: Ensure you have a stable internet connection to avoid interruptions.
3. Save Your Work Regularly: The DS-160 form can be time out due to inactivity.
4. Take Note of Your Application ID: Write down your application ID and security question answer.
5. Review the Application: Before submitting, review the entire application for any errors or omissions.
How to Handle Technical Issues with the Online Form
1. Browser Compatibility: Ensure you are using a compatible web browser. The DS-160 form works best with the latest versions of Internet Explorer, Firefox, or Chrome.
2. Form Timeout: The form may time out after a period of inactivity, causing you to lose unsaved information.
3. Application Freezes or Crashes: If the form freezes or crashes, try refreshing the page or reopening your browser.
4. Error Messages: If you encounter error messages, carefully read the instructions provided to resolve the issue.
5. Technical Support: If you cannot resolve technical issues, contact the support service provided by the U.S. Department of State.
By following these tips and best practices, you can avoid common pitfalls, ensure a smoother application process, and effectively handle any technical issues that arise. This preparation will help you complete your DS-160 form accurately and efficiently, paving the way for a successful visa application.
Know more about the information
Mastеrs (MS) in USA – Top Univеrsitiеs, Coursеs & Eligibility
Scholarships in USA: Financial Aid for International Students in the USA